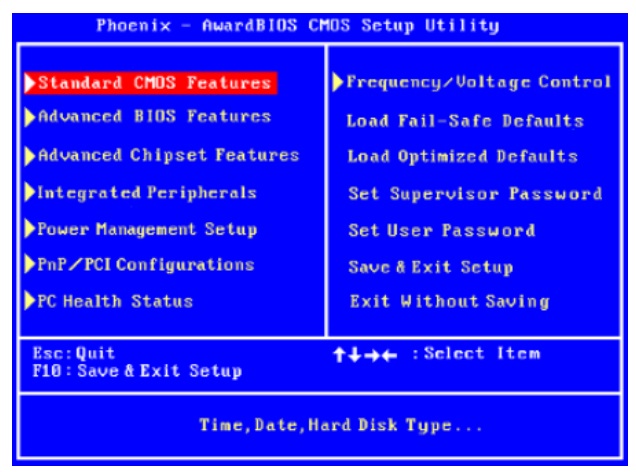
AIM :- CMOS SET UP
PROCEDURE
THEORY
What is CMOS?
Complementary metal-oxide semiconductor, or CMOS, typically refers to a battery-powered memory chip in your computer that stores startup information. Your computer's basic input/output system (BIOS) uses this information when starting your computer. CMOS-related error messages could be caused by a faulty or discharged battery. The battery can become discharged if your computer has been turned off for a very long time. To resolve CMOS-related errors, check the information that came with your computer or contact your computer manufacturer. Because your CMOS settings are specific to your computer's hardware, Microsoft can't provide specific instructions for changing them.
CMOS BIOS settings
There are three company BIOS chips. They are Award, Phoenix and AMI. When you press Del or F2 or F10 key at system startup. These CMOS BIOS settings will be opened. Marked the keys and options. These are the keys to open BIOS settings at startup.

Step 1: Prepare Your PC
- Backup Important Data: Before making any changes in the BIOS/UEFI, ensure that you have backed up any important data, as incorrect settings can lead to system instability.
- Gather Information: Familiarize yourself with your motherboard's manual, as it often contains specific information about accessing and using the CMOS setup utility.
Step 2: Access the CMOS Setup Utility
- Restart Your Computer: If your PC is already on, restart it.
- Enter BIOS/UEFI: During the boot process, press the designated key to enter the BIOS/UEFI setup. Common keys include:
- Delete (Del)
- F2
- F10
- Esc
- F12 (The specific key may vary based on the manufacturer; look for a prompt on the screen during startup.)
Step 3: Navigate the CMOS Setup Utility
- Use the Keyboard: Most BIOS/UEFI interfaces are navigated using the keyboard. Use the arrow keys to move through the menus, and the Enter key to select options.
- Explore Different Sections: Common sections you may find include:
- Main: Basic system information (CPU, RAM, etc.)
- Advanced: Advanced settings for hardware configuration.
- Boot: Boot order and options.
- Security: Password settings and security features.
- Exit: Options to save changes or exit without saving.
Step 4: Modify Settings (If Necessary)
- Change Boot Order: If you want to boot from a USB drive or another device, navigate to the Boot section and adjust the boot priority.
- Enable/Disable Hardware Features: You can enable or disable features like virtualization, integrated peripherals, or power management settings.
- Set System Time and Date: Ensure the system clock is accurate by adjusting the date and time settings.
Step 5: Save and Exit
- Save Changes: If you made any changes, navigate to the Exit section and choose the option to save changes and exit (often labeled as "Save Changes and Exit" or similar).
- Reboot: Your computer will restart with the new settings applied.
Step 6: Study and Document
- Take Notes: Document any changes you made and their effects on system performance or behavior.
- Research Settings: If you encounter unfamiliar settings, research them online or refer to the motherboard manual for detailed explanations.
Step 7: Troubleshooting
- Reset to Default: If you encounter issues after making changes, you can return to the CMOS setup utility and load the default settings (often found in the Exit section).
- Clear CMOS: If necessary, you can clear the CMOS by using a jumper on the motherboard or removing the CMOS battery for a few minutes (refer to the motherboard manual for instructions).


Post a Comment
If you have any doubts, please let me know