An Introduction to the X Window System
This is a limited introduction to ‘The X Window System’, which is widely
but improperly known as X-windows, specifically to version 11 (‘X11’). The intention of
the X-project has been to provide ‘tools not rules’, which allows their basic system to
appear in a very large number of confusing guises. This document assumes that you are
using the configuration that I set up at Peyton Hall †
There are helpful manual entries under X and X server, as well as for individual utilities
such as x term. You may need to add /usr/princeton/X11/man to your MANPATH to read
the X mainpages.
Introduction to X’s Anatomy
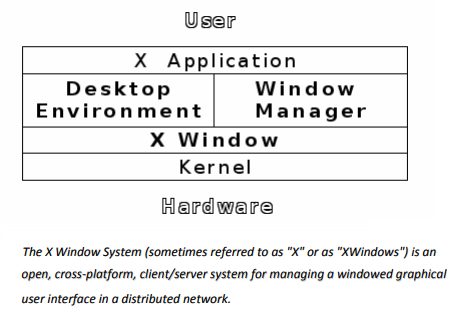
X consists of three parts:
The server
The part that knows about the hardware and how to draw lines and write characters.
The Clients
Such things as terminal emulators, dvi previewers, and clocks
and
The Window Manager
A program which handles negotiations between the different clients as they fight for
screen space, colors, and sunlight.
Another fundamental X-concept is that of resources, which is how X describes anything that a client might want to specify; common examples would be fonts, colors (both
foreground and background), and position on the screen.
Keys
X can, and usually does, use a number of special keys. You are familiar with the way
that a and a are different from a; in X this sensitivity extends to things like
mouse buttons that you might not normally think of as case-sensitive. In addition, there
is another modifier called ‘meta’ which can be used either alone or in combination with
shift or control. On a sun-3 keypad there are two identical meta keys labelled ‘Left’ and
‘Right’, on a sun-4 they are labelled ‘Alt’ and ‘Alt Graph’.
To start X,
type xinit; do not type X unless you have defined an alias. X by itself
starts the server but no clients, resulting in an empty screen. (Solution: read the section
on ‘Problems’).
How should you leave X? Go to the black window labelled ‘Console’ in the top left
hand corner of the screen and logout. Why this works will soon become plain.
The X-Server
You shouldn’t often need to worry about the server. On our suns we mostly use
one called Xsun, although it is possible to use one provided by sun called openwin (Sun’s
implementation of X is called OpenWindows; it has an associated window manager called
olwm and I shall discuss it no further).
It is possible to pass flags to the X-server on the xinit command line;
for example
xinit -- -zaphod
passes the flag -zaphod to the server (the ‘--’ mean that that arguments should be passed
to the server not interpreted by xinit).
The Window Manager
twm
All programmes running under X are equal, but one, the window manager, is more
equal. By convention it is appointed and anointed to be responsible for moving windows,
drawing one window above another, converting windows into icons and back, and a large
number of other tasks. It is the window manager that to a large extent controls the
look-and-feel of your screen.
The window manager that you will be using if you use my default startup files is called
twm (it used to stand for Tom’s Window Manager, after the author). When it starts it reads
a startup file called .twmrc which is described under ‘dot-files’ later in this document. Most
of the description of twm that follows assumes that you are using the Peyton Hall default
.twmrc file (as listed in figure 2 and discussed under ‘dot-files’).
You will notice that most of the windows on the screen have a title bar at the top
(.twmrc sets it to a brownish-yellow called goldenrod), which has five regions: a square with
an X in at the left (X), a name, a central region that changes colour when the mouse is in
the window, and two squares at the right; one looking like ×+, and one looking like . If
you click a mouse button in the X box the window will be iconised (click in the icon to get
it back), if you hold down the left button in the , a set of lines dividing the window into
9 parts will appear; if you move the mouse off the edge of the window (with the button
still down) the outline will follow, and when you let go the window will be resized. If you
hold down the left button in the ×+ box and move the mouse the window will be moved.
When you create a new window (e.g. by typing xterm &) without specifying its position
(see the section on ‘Command Line Options’), twm will put up an outline of the window
‘attached’ to the mouse. Push Button1 to create it at its current position, hold Button2
2
down and move the mouse outside the outline to choose some other size, or push Button3
to create the window where it is, but extending to the bottom of the screen.
Instead of icon windows it is possible to use an ‘icon manager’ that keeps all icons tidily
together. You can try this by using the ‘window commands’ menu (see next paragraph),
or choose it permanently by reading the manual.


0 Comments
If you have any doubts, please let me know